Showing posts with label pot. Show all posts

16 June 2013

Progress Report: Still Alive!


Strawberry: Sequoia

Herb Pot
 
Sunflowers: Solar Eclipse and Incredible 

Sugar Daddy Snap Pea
 
Sugar Daddy Snap Pea
Nasturtium: Milkmaid

Corn: Martian Jewels (1 of 5 pots)

Bean: Blue Lake Bush

Bean: Blue Lake Bush
Bean: Scarlet Runner Pole
 
Zucchini: Dark Star
 
African Marigolds

14 June 2013

Variety: Tyee F1 Spinach (O)
Sown (Direct): 8 MAY 2013
Germinated 17 MAY 2013

This is mid-June in the Pacific Northwest.  No salad! No freezer stock.  Had I gotten this garden started just a bit earlier, this could have been avoided, no doubt. All but 2 plants have bolted and most literally overnight. The seedlings that were sown indoors a month prior never produced more than a single set of true leaves and bolted, as well. This is supposed to be a bolt-resistant variety and the temperatures have certainly not warranted this premature bolting, but I hear our long days can definitely contribute.  Since it obviously isn't the weather, I'm hard pressed to buy that it's anything other than the long days.

I'm in no hurry for fall, but can't wait to seed some more spinach for fall harvest.  Any recommendations?

09 June 2013

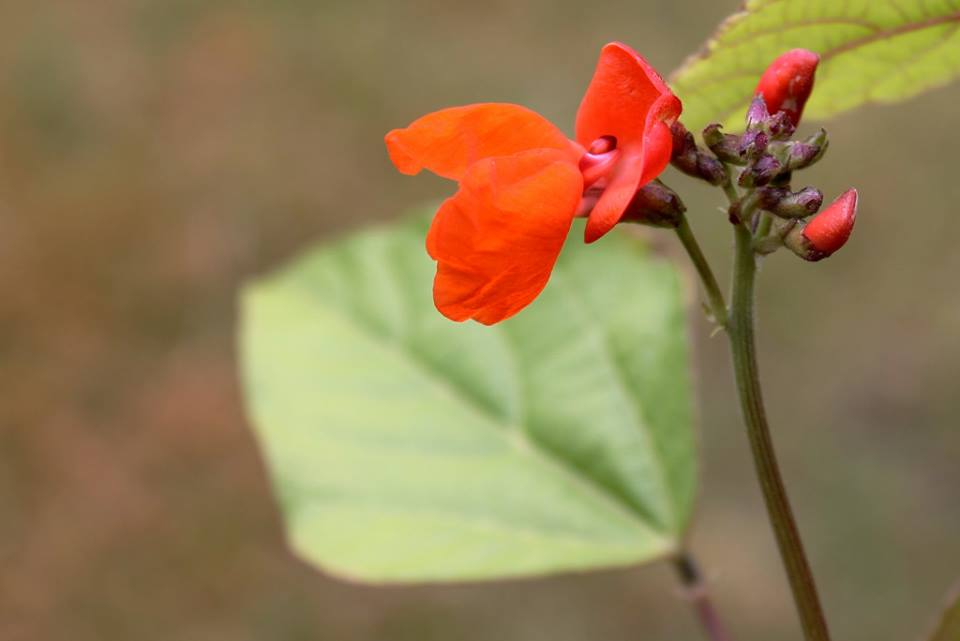
Phaseolus coccineus (Scarlet Runner Pole Bean )

This beautiful edible and most ornamental pole bean is a sight to behold. My 3 pots worth have weathered several storms, been near frozen, windwhipped, and brutalized by mother nature. I had actually reseeded the pots assuming certain doom was upon them. While barren of leaves in a few spots, they are thriving despite their abusive welcome to the world as they emerged from the soil. It is my wish that the later planted seedlings beneath their beat up brethren will fill in the "holes" and give us a grand display of both colour and foliage.

I have to admit, gardening in a pot is not necessarily difficult, but terse in moments.

02 June 2013

The Lay of the (Pot) Land (Post Stage)


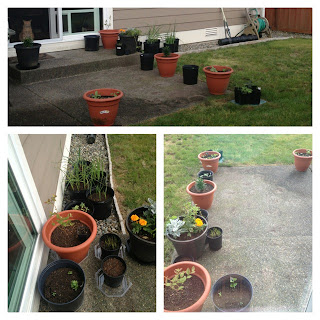
My pebbled patio is replete with 60+ tiny circles, each surrounded by the unavoidable green algae and moss that emerges from yes, even cement during the dreariest of seasons in the pacific Northwest. The excitement that follows those now barren circles is simple delight in watching everything grow and (for the most part), thrive in their nondescript potting containers. Better yet, the possibilities to come in the following weeks and months.While we have been rain free for the past week, we have managed to get the beds cleared and staged pots into their permanent locations for the season! *Woot*  I thought it would look awful, but other than being majorly restricted to straight line side beds, it doesn't look too, too shabby.  Ordinary, but good.  Mediocre, but awesome for what those pots and plants will soon bear.

One week later, there are no fatalities and plants are thriving.  There is still a most abundant area for all the nightshades, and I can't wait until the foliage from all starts spilling forth.  "Container Gardening "One or None" still a "1" for now and hopefully remains so! :)

Original prestaging condition of the BackYard Pot Plots.

01 June 2013

 
And the (not so) itsy bitsy slugs went up the water spout...

Our pots have been inundated with the rain for nearly a month. The first two weeks, there were at least several hours of dry time between the heavy showers and the plants were at least content with the refreshing drink during early growth.

The past couple of weeks those same plants have endured an almost constant barrage of rain.  Just this week, we saw leaves begin to yellow and the early signs of drowning ready to consume my hard won seedlings, which were becoming large enough to call plants.

A sad pot of snap peas that had endured not only the past month of rains, but two previous wind/rain storms will likely not make it.  I reseeded under the dying growth in the hopes they will spur to life before it gets really warm (we have partial sun/shade spots, so hoping they have a chance).

I did not fret too much as anything that may have drowned was reseeded, will be reseeded, or appeared to be just fine.  But when the yellow leaves began to show on everything, I worried--just a little.

With the rain, the pots are still staged on the patio.  We hope to finish weeding the side beds this weekend and get those pots where they belong (which, with another month of rain, has all kinds of great growth and new things to remove).  The Scarlet Runners shy of their tall teepee and clinging to one another on the overgrown temporaries that will have to be left in place under the large teepee.  They are quite happy, save for the couple of skinny feet at the top with nowhere to go.
 Black Turtle Beans

 Green Onions


 The patio pot staging zone (the DMZ). All set for sidebeds this weekend, hopefully! Good weather on the horizon!


Nasturtium (Empress of India)
 
  Nasturtium (Milkmaid and Alaska Mix (Variegated)

Connecticut Field Pumpkin

Dark Star Zucchini with slug hole.


Nasturtium (Milkmaid) under Scarlet Runners


Nasturtium (Milkmaid)


Black Turtle Beans


Green Onions


 Sugar Daddy Snap Peas


Sugar Daddy Snap Peas


Sequoia Strawberries
 
 
Jersey Blueberry 


The photos are from today as the sun unleashed itself through the dense cloud barrier that has been so dominant these past weeks.  A bit yellow, but looks like everything will survive (at least that how it appears right now). 

As We Make Our Way Out to the Sun

EWWW! Even the baby snails ran for high ground during all those weeks of rain. This is the top of the sliding glass door-disgusting.   I was really just fighting my way out of the door to clean all the glass.  It gets a little mottled after such a lengthy deluge of rain. 

They are smashed properly disposed of now. While the slugs were mowing the carrots, we wondered what tiny thing gnoshed tiny holes in the center of the nasturtiums.  Now we know!

These guys are not nearly as gross (or intriguing) as the giant African snails in Hawaii--just saying!

Break over--I just wanted to share the gross out of my current heebie jeebies! This is definitely not what one wants to find when cleaning all dirty rain spots off the glass!

Off to assess the rain damage to our little green friends. . .

22 May 2013

Container Colour and Nasties

Container colour seems to have an informal science behind it. Dark is good, dark is bad, light is good (have never read light is bad), and so it goes on about how container colour can impact the productivity of our container plants.

My container garden is large. I am also trying to keep it to as close to organically certifiable as possible (which has likely turned me certifiable in moments). I cannot escape the use of nursery trade pots. Budget disallows my preference for large terra cotta pots or even fiberglass wannabes. Did I mention the terra cotta is also good, but also bad?

Light pots tend to reflect light, thus leaving the container requiring less water on those particularly "warm" days.

Dark pots tend to absorb the light and heat, thus rendering the container a miniature oven for roots and requiring 1-2x, sometimes 3 waterings a day, depending on the latest and greatest information.

Terra cotta tend to leach their moisture, keep the soil cool, and crack in the winter. Personally, I've never had a terra cot pot of any size crack in winter, but I can certainly understand how that could happen. I do know they will keep the soil cool, but the claim that they lose their moisture is beyond me for I've never seen this, myself. Perhaps it is my location(s) that make that different.

My trade pots are black, a near black, and dark gray. This means my stealthy green friends may be warm and possibly be responsible for root scorching as the plants mature . We've hit some grand temperatures between the rain and storms. Even in the mid 60s, those pots are hot to the touch. For this season, I will be able to water at least twice a day and monitor them for hydration and evaporation. For the long term in container gardening, I don't think this is a great way to go, but you've got to use what you have, can get, or afford.

I had a large number of pots to purchase, so I purchased my plastic trade pots in small bulk. I much prefer the earthy feel of terra cotta, but I would have ended up with a few large and lovely terra cotta fixtures on the patio and no true container garden to speak of.

Moving on to the real question that begs to be answered, how do we mitigate the black trade pot?

Optionally, we could spray paint the pots (I was really considering glow in the dark paint, but at 70 pots, the investment did not really seem worthwhile and may have ended up a bit on the cheesy side of aesthetic appeal. 

After all, we do have to look at these all season long!

Alternatively, in staying organic, we bought a truckload of nasturtiums ("Nasties"), Milkmaid, Alaska Mix, and Empress of India. Their companion-friendliness to almost all other vegetables precluded our decision to basically shove a few seeds in every pot.

"Why would you do that?", I imagine you are asking!

Well! It is our hope that the nasturtiums will grow, flowng over the sides of the pot in a pleasing cascade, essentially covering (and ultimately shading) the darkness of the container colour. Voila! Problem solved. Or so we hope!

Of course, it will take a bit for the nasties to fill and spill, but while the seedlings are young, that soil needs to be essentially warm and comfortable. With the spring rains still in the air, moisture is the least of the problems while then nasturtiums take over.

Bonus perk: if our garden absolutely fails, we at least have the nasturtiums to enjoy, both for eating and eye candy!

We may have possibly overdone the nasturtiums. . .

20 May 2013

Weather Woes

5/21/2013 19:30:00PM
The more days of rain, the more effects I see on my large, fledging pot garden.  The pots are still grouped on the patio for ease of care and monitoring.  I am starting to see yellow leaves.  There are far too many to bring in.  Hoping for longer dry periods to remove the excess moisture that was good in recent days, but beginning to show the potential toll on the seedlings, some of which are growing into full on plant phase.

The winds today changed direction over and over.  The paper birch tree was doing a hula swaying one way and then the other throughout the day.  What we thought was a fine pruning, the winds have totally shown us to be false. 

5/20/2013 10:52:00 AM
Gray, rainy, windy. Wash, rinse, repeat. For the past two weeks.

Really.

Little sun, but quite lovely when it pokes out between the fog and the long overcast mornings. Spotty at best and insufficient time out to keep the hardening process up outdoors.

They promised 70 degrees and sun this afternoon. Welcome to the PNW!

Tomorrow is a new day.  I shall continue working on the previous blog posts that have yet to be published.

12 May 2013

Mothers Day Addition

Asiatic Lilies - no info on the label, unsure of what variety these may be. Beautiful nonetheless and the thought with which they were delivered was so very special--my other half knew I was missing the islands and thought they would brighten my day and remind me of what was "home" for so many years. He did select just the right shades and really made my day with such a vibrant colour choice.

Does anyone know offhand which variety these are?  I have found similar varieties, but not an exact duplicate.

10 May 2013

Green Onion Renewal: Who Knew!

I don't want to call this "recycling" as green onions are a living thing!  But that act is exactly what it is--recycling.  Imagine my surprise when I discovered that one could not only recycle the green onions, but propagate an equal amount weekly! For free!  Amazing! As we would say in Hawaii, onolicious, too! I've been buying those weekly forever! As of my discovery, I do not plan to purchase green onions in the future. Like, ever. Not again.

It only takes a bit of the white end of the green onion to renew itself.  As long as there are roots and enough of the base onion to hold those roots whole, it is as easy as snipping and placing in a cool glass of water in a window sill.  I change the water every couple of days because, ewww, don't want to eat something that has been sitting in rank water for long.  I've even left them for 3 days and water appeared fresh and not slimy.  One only needs enough water to cover the roots. The nub needs enough white with roots to proceed.

After two harvests, I planted the original cut onions (which I also cut long to test this recycling deal) into soil, so I have a glass tumbler (a mismatched leftover of a bygone era) holding up my onion stems in the kitchen window and a pot of onions outside.  I plan to rotate them every so often because I cannot find any information as to whether growing in water will maintain full nutritional value. An educated assumption of reason tells me that after some time, the nutritional value may weaken due to lack of renewed nutrients. 

Then again the new onion is well,  renewing, so alas, this question begs an answer.

The onions we harvested this way were perfectly pungent (perfect aroma/oils for a green onion) and were crisp and juicy.  Very impressive.  I cannot even recall the last time I had green onions that fresh or tasty.

My poultry shears are getting a little dull, so I highly recommend a nice sharp pair of shears for harvesting. I will be getting a new pair or using a dedicated pair for this purpose.  After these first few weeks, I am absolutely thrilled that I have garden fresh green onions at my whim!

Luckily, the last grocery store green onions we purchased were organic.  I do have green onions growing from seed after two failed attempts that are now thriving.

Variety: Evergreen Bunching Onions
Sown: 1 APR 2013 (first attempt totally indoors-frail and weak)
Germinated: The current thriving batch: end of April - 4" long as of this writing.

05 May 2013

Epic Fails

How many times, no matter how ahead of the game we think we are, do we inevitably have a batch of seedlings that fail to thrive or seeds that act as if they are never going to germinate! 

The bane of my very existence this year seems to be getting my tomatoes warm enough or in enough light.  Lesson learned.  More light.  Many of the first batch seem to stunt after the first couple of weeks.  While I have seedlings from 4/1, they should be much, much larger than they are now.  Subsequent plantings two weeks ago have caught up with and bypassed those original starts.

I've reseeded my Jelly Bean tomatoes time and again--I will be lucky to get a single plant much less a couple of each, both red and yellow and still at this point, I'll be really lucky to get one.  I was so looking forward to that little grape delight!

Amazing, right?

Nightshades. yes, all of my nightshades, same problem.  Same fixit--start over.  I somehow seem to be determined to provide TLC and CPR to those first stragglers who are slowly trying to nap out of it.  Some because I'm running out of a couple of those varieties... my herbs are not doing so hot, I think that is due to bad environment, they get shoved aside time and again.  They are in the right conditions now, so I hope to not have to bother with them any time soon as they were flourishing previously.

I know we all have some plants that just don't grow for us, whether it is level of care, temperatures, weather, light, humidity or lack thereof, and other environmental issues such as soil--too warm, too cold, too damp, too dry.  The list goes on. . .

As for houseplants, specifically, I've never been able to keep a Boston fern alive for long at all, while my father could keep immense ferns alive for decades. I've never really had a problem with my nightshades, so I'll blame it on being in the PNW on the Western side of the slopes, haha.  C'mon, we've all got to have an excuse! ;)

What are some of your lesser successful germination plants and problems?

04 May 2013

Luffa! Loofah!

As you can tell by now, my return to the garden also brought with me a few bit necessarily unique, but 'unique' side items.  A friend of mine mentioned growing loofah, while my education is fairly well rounded, who else did not know the "rough scrubbie" (not the soft squishy sponge for afterwards) was borne of a gourd instead of from a pineapple under the sea?!

Me.

I've used these silly things since I was a small child--both the luffa/loofah and sea sponge to exfoliate and smooth. It's not often that I am taken aback with new information, but more so I am taken aback that I just never thought to think more about it.  What I do know, however, is that cheap plastic scrubbies tear the skin and often leave lacerations (I recently got married with a small scratch on my forehead to illustrate this point).  While one can certainly do the same with a natural luffa, the likelihood of leaving a wound is far less is moistened appropriately before use. 

It's all good now! I've got a packet of seeds and a handcrafted masterpiece of a bamboo cane arbor I lashed together in only 5 hours!  (See post here: The Art of Handcrafted Trellis Architecture ).

The seeds were quick to germinate, seedlings quick to grow.  The luffa did not go through the hardening process well.  While one plant transitioned to the outdoors with ease, the other wilted slowly with the change.  As with all of my indoor starts, I plugged a couple of seeds in the soil when they stayed outside permanently.  A short week later, the surviving plant wilted.  It is still hanging on, but we are now relying on the upcoming starts originally planted directly outdoors.

More on growing and harvesting soon!

Variety: luffa aegyptiaca (H)
Sown: 08 APR 2013
Germinated: 15 APR 2013